Love Your Life Friday: Art Display Boards
DIY Art Display Boards
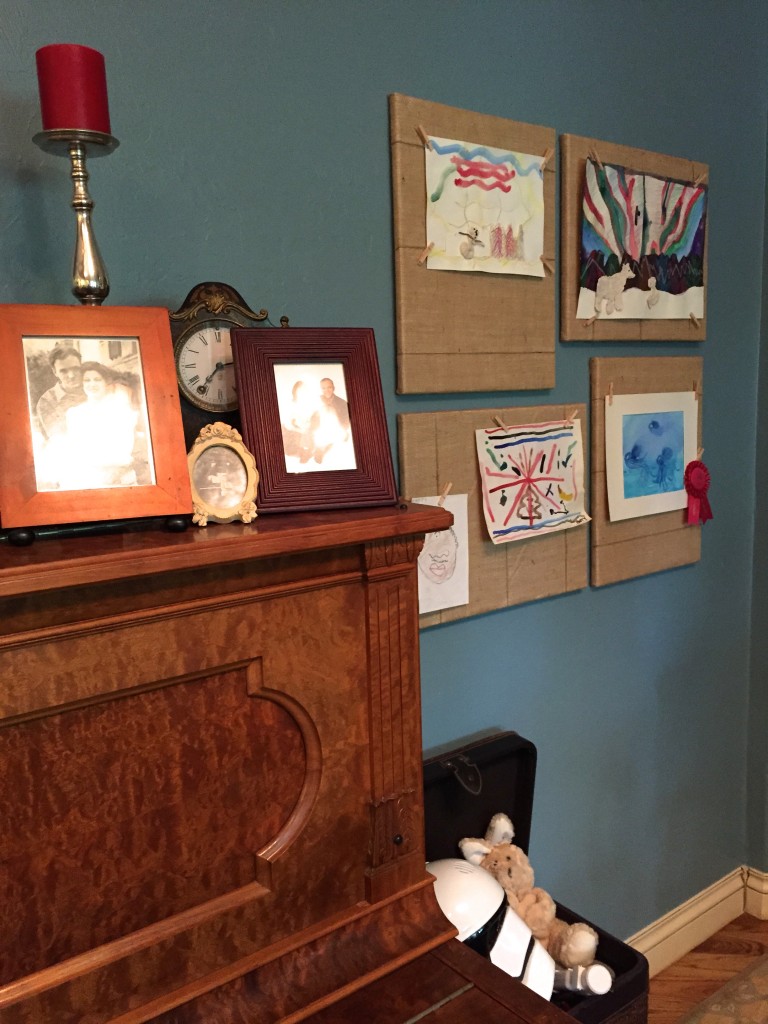
Tiny masterpieces. Every home with little hands and creative minds is overflowing with them.
My two boys love to draw and create works of art. For a while my husband and I were constantly running out of paper in our home office, wondering who was doing so much printing until we discovered that our boys saw the printer as their own personal paper dispenser for comics, art, notes, drawings, etc. Now we have a 10 drawer rolling cart for art supplies and another 3 drawer organizer just for pens, pencils and markers.
Add up all of the drawings created at home with the art work created at school and I have enough original art to fill the Louvre. Our mediums range from pencil drawings to water color to paper machete. The themes wildly vary between sweet friends under a rainbow to zombie turkeys with lasers shooting out of their eyes. A museum curator wouldn’t know where to start. Unlike the Louvre, I don’t have unlimited wall space or framing budget. I have to pick and choose which great works of art adorn our walls and I would like the display to look nice without having the cost of fancy display boards or the inconvenience of finding frames that fit and then having to change out the art from frames.
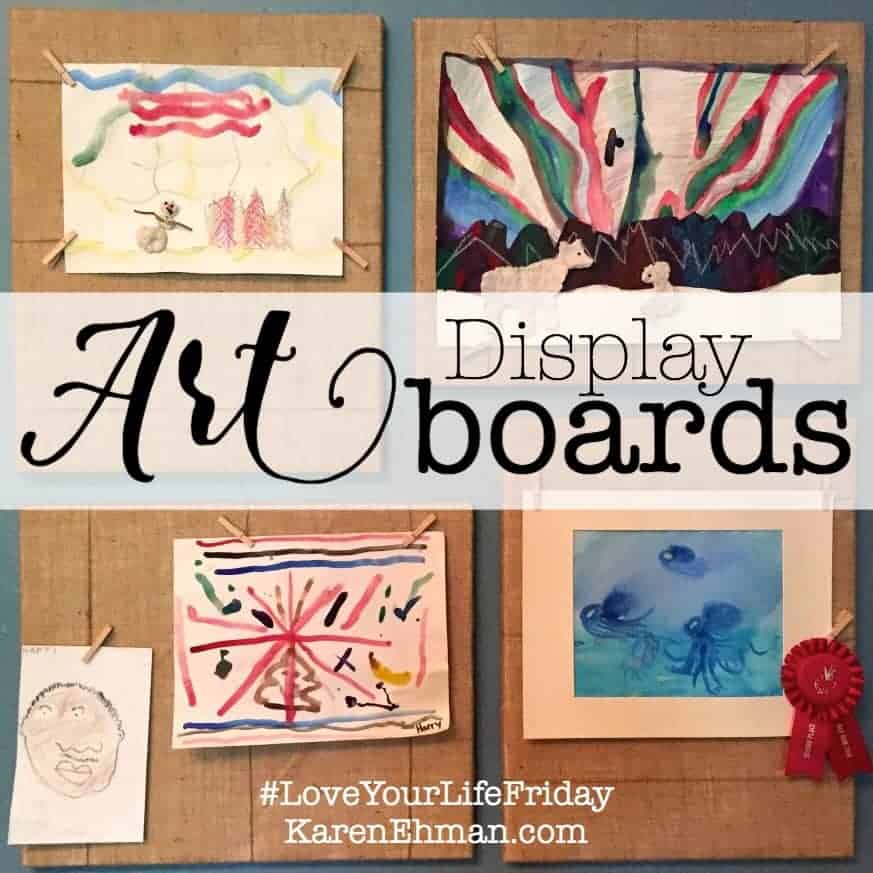
Several years ago I knew I wanted to cover my dining room wall with my children’s art but I needed something easy and inexpensive. I found the answer in a trip to my favorite craft store. At about $8 each, these burlap covered canvases work perfectly to create a whimsical art display that won’t break the bank or my patience.
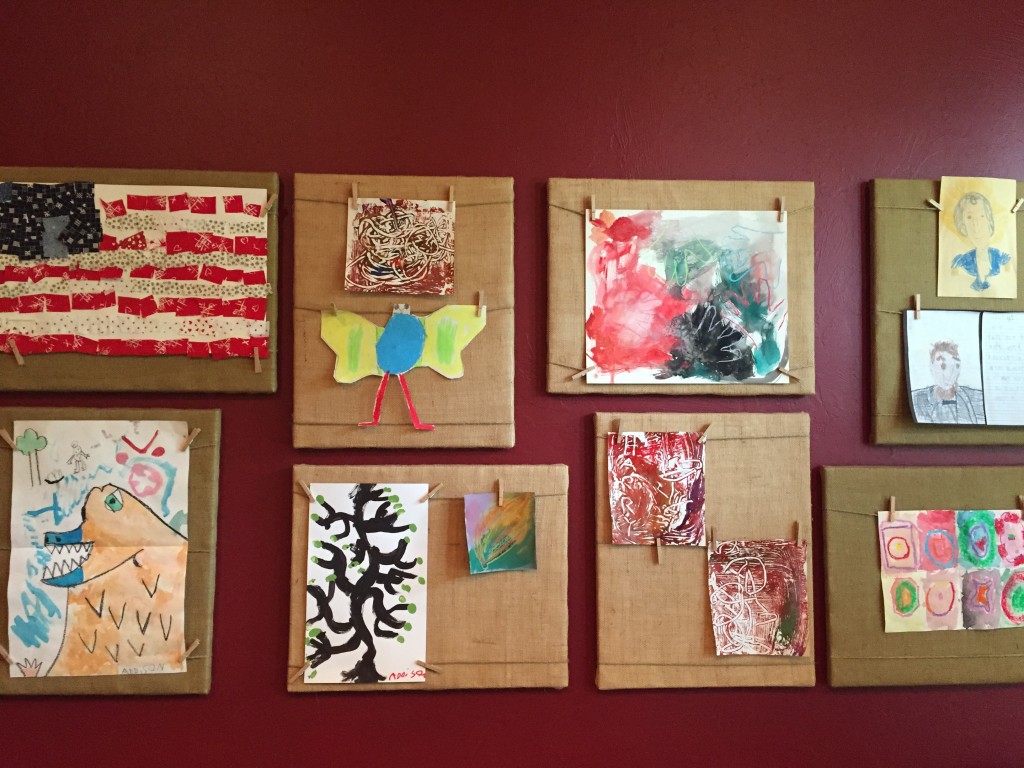
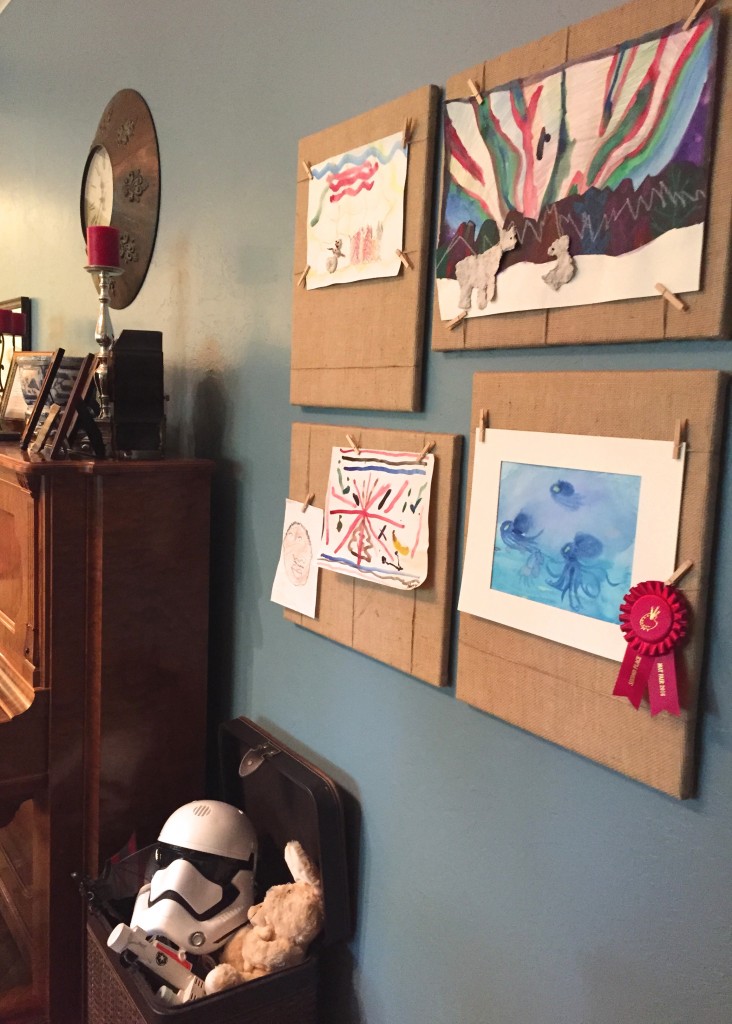
I get so many compliments on this display when guests come over. One of the reasons this is so appealing is that it highlights the art and not the display boards they are hanging on. They are cute enough for my dining room and living room without drawing attention away from what I really want to see; the art.
These DIY art display boards can be made in less than 30 minutes and are a fun way to display all of the creative projects your kids can dish out.
What you will need:
20×16 blank artist canvas
burlap
staple gun
twine
mini clothes pins
scissors
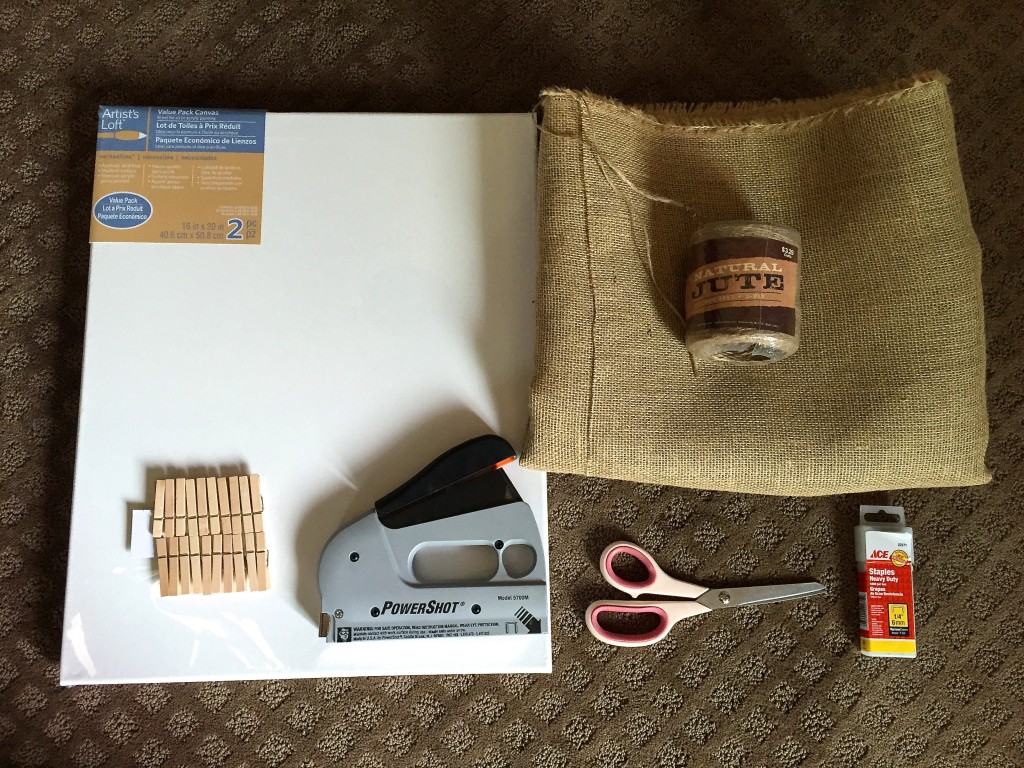
Many craft stores sell these canvases in packs of two for less than $8.00. Burlap can be found on sale for about $5.00 per yard and one yard of burlap will cover four canvases.
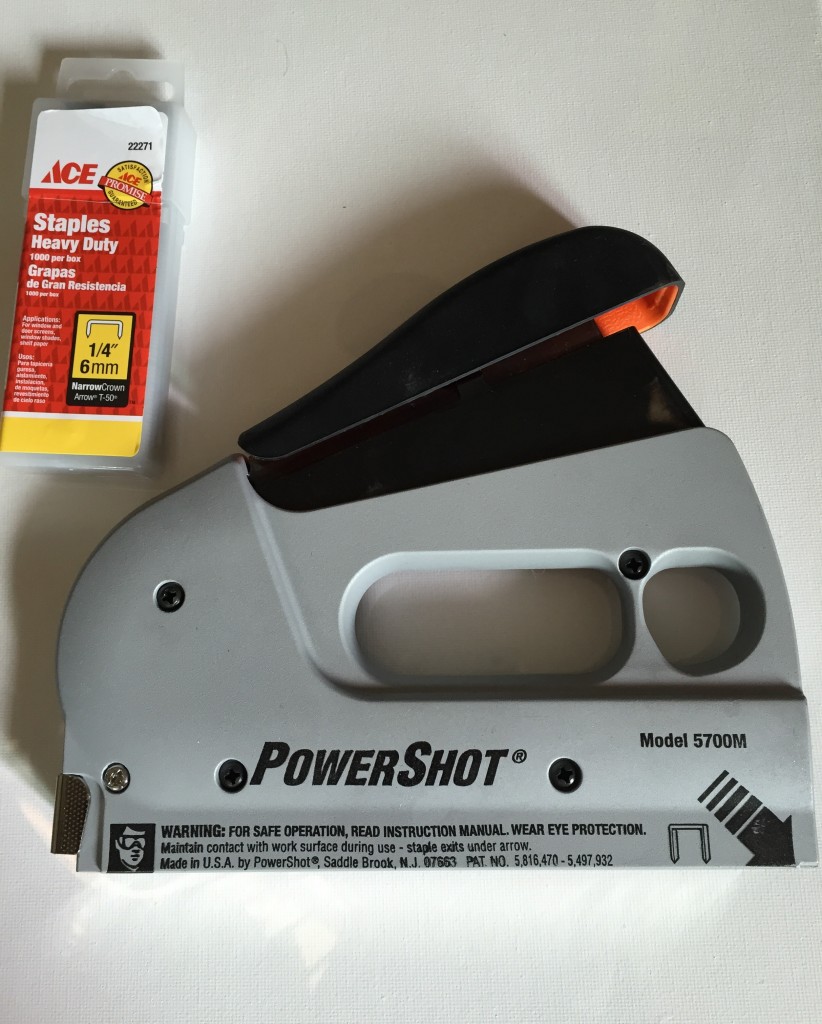
Let’s talk about staple guns. If you don’t have a staple gun that can only be found at a hardware store, it’s time to invest in one. This PowerShot staple gun was $25 and worth every penny. It can hold multiple sizes of staples as well as upholstery nails. The staple gun found at the craft store won’t cut it for most projects. They are plastic, will break easily and not powerful enough for the serious DIY-er; unless all you need to do is staple a q-tip to a cotton ball.
How to create a DIY art display board
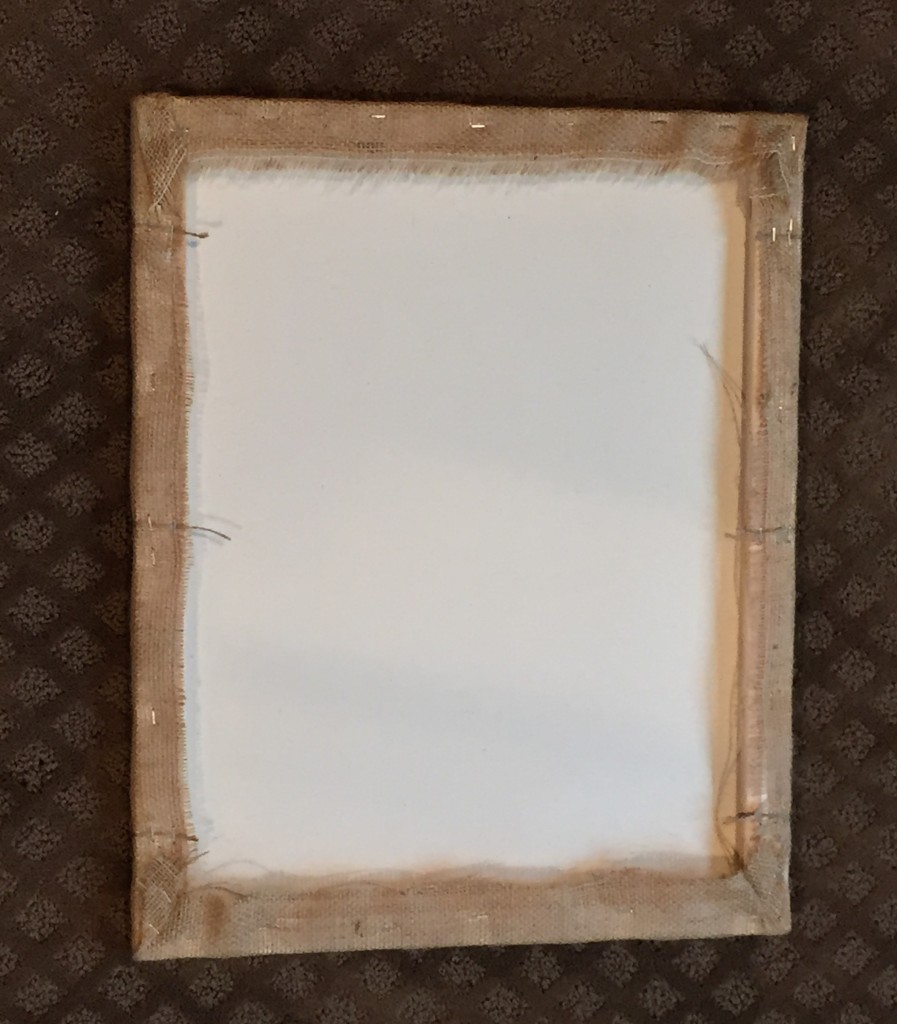
Start by spreading out the burlap and laying the canvas, face down, on the burlap. Cut burlap around the canvas, allowing for a three-inch edge all the way around the canvas.
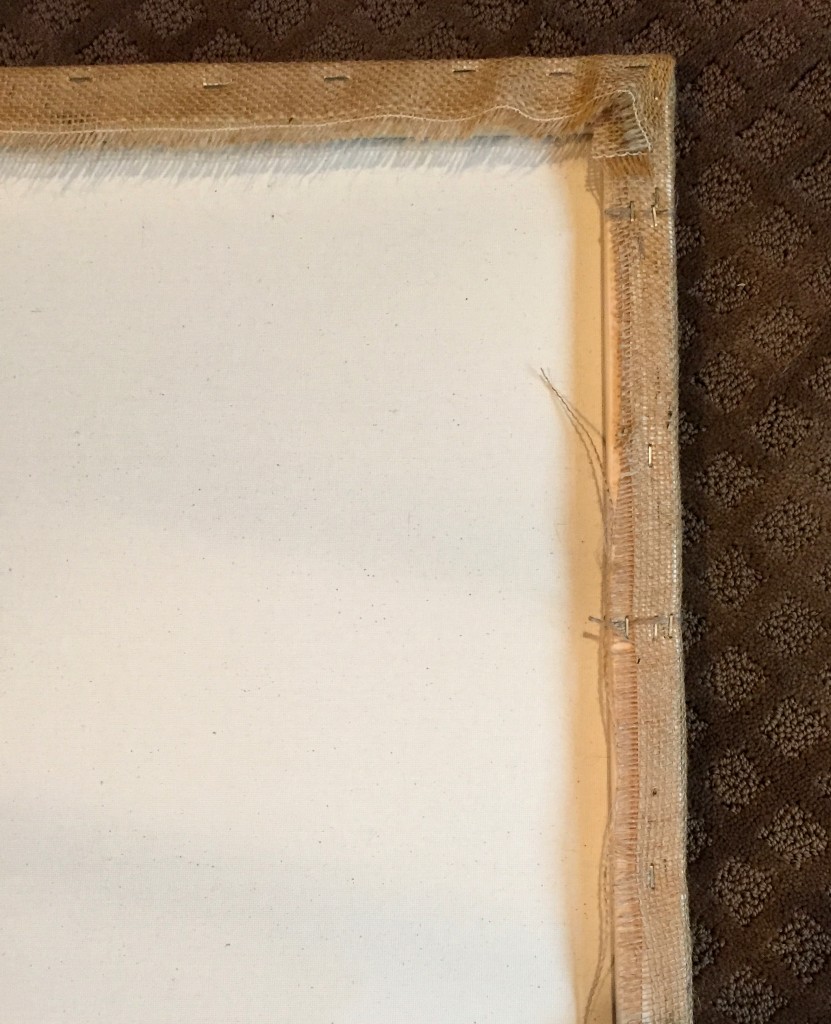
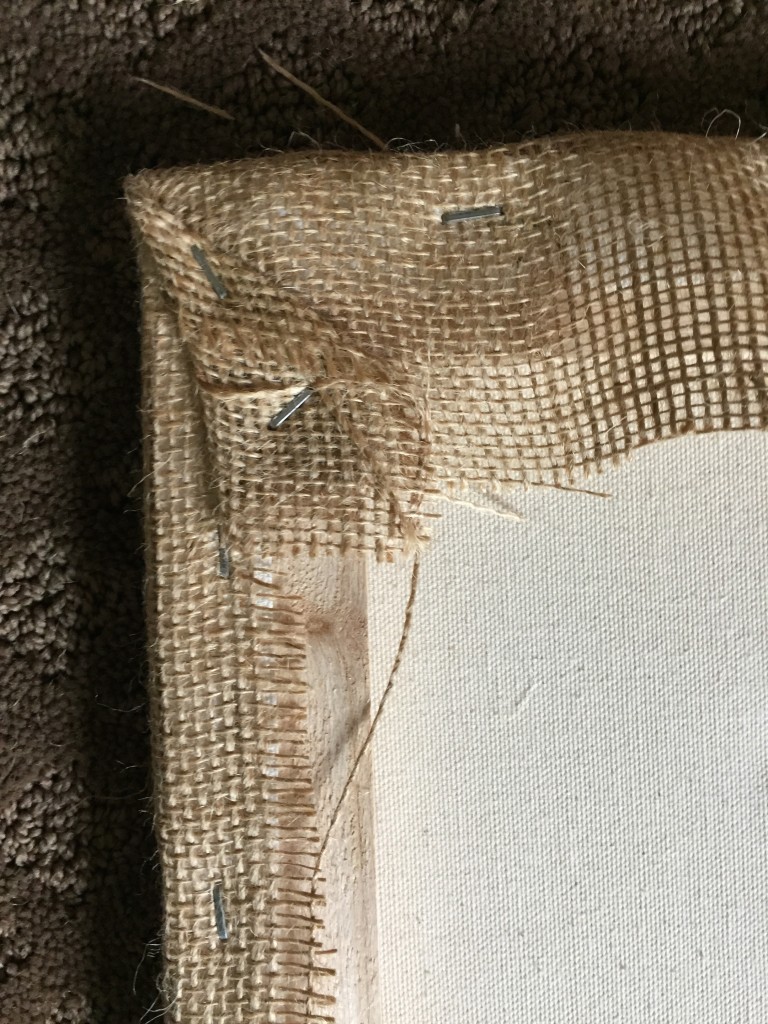
Fold the burlap over the back of the canvas frame and staple to hold the burlap in place. Only do one or two staples halfway down the frame. On the opposite side of the frame, fold the burlap over the frame to the back of the canvas, pull the burlap tight and staple to the frame. Continue all the way around the edge of the canvas, alternating sides to make sure the burlap is tight and even. Save the corners for last.
Fold the corners over onto the back of the canvas, kind of like you would fold the corner of a bed sheet and secure with a few staples.
Cut three pieces of twine, 22 inches each. The first piece of twine will lay across the front of the canvas, three inches from the top. With the canvas face down, on top of the twine, secure the twine to the back of the canvas frame with two staples. On the opposite side, pull it tight and secure the twine with two more staples. Repeat this process for the middle of the canvas and three inches from the bottom of the canvas.
Clip the mini clothes pins to the twine on the front and you are ready to display your kiddo’s precious art! These DIY art display boards are so lightweight that two small nails are all it takes to hang them up. Just make sure to use a level when marking where you want the nails to go.
 Stephanie Clinton is a writer and blogger but more importantly, a wife and mother to two little boys. In addition to writing her own lifestyle and parenting blog, Hugs, Kisses and Snot, she is a community manager for Oklahoma Women Bloggers and contributor for The Glorious Table. In her free time (if there is any) she can be found wiping snotty noses and volunteering in her community, church and children’s school. Learn more about Stephanie her passion to encourage women and help lighten their load at www.hugskissesandsnot.com.


These look fabulous. I love the look of burlap and they really do let the art work shine.